Thursday, July 21, 2011

Progress in the new kitchen!


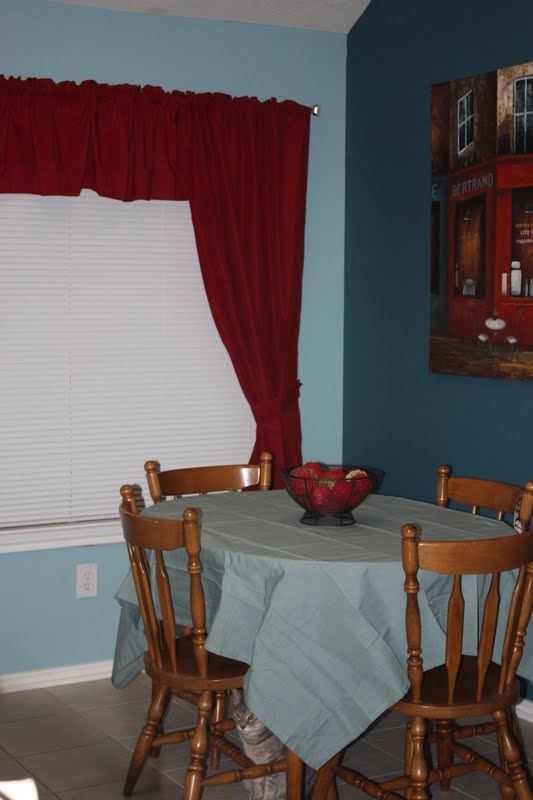
I know it's not stamping related, but since we are using SU colors, I thought I'd share.  :)   We finally found curtains, a tablecloth, a few accessories to match.   We just need a few splashes of color for the counter tops and I think we'll be done!  Yay!    (Pardon the wrinkles; we had to make sure we liked everything and were keeping it all before we jumped into ironing)

A Bit More of Convention


Look at all this stuff!   This was all the new stuff that I brought home from Convention.    My suitcase gained 13 pounds while I was there and my carry-on felt much heavier as well.   They should tell you to bring your husband with you just to help carry things.  :)  


Look at the snow!    I am from the gorgeous mountain of Kentucky, but these were so different and amazing!  This was taken on the way to the Stampin' Up! home office in Riverton.   What a fun trip that was; it looks like such a wonderful place to work!  


Here's what I'll be working on Saturday.  I took a +fun class at Convention, but I didn't want to add all the elements to my little houses and risk them getting destroyed in my suitcase.   I did paint them and get a few things punch and ready.  I must have the distressing kit after playing around with it in class; we used it to add a little age to the houses!   I was thinking about offering this as a class this fall, so let me know if you are interested!  


This is my other project for the weekend.  I have some good friends coming over to hear all about my trip and assist me with my projects, so it should be fun.  :)   I didn't make this in my make-and-take session because again, I would have cried if I'd messed it up bringing it home.   I love this and thankfully, this box will be available in the Holiday Mini so you can make one, too!  

Wednesday, July 20, 2011

CC332: pool party with wasabi chips

Here is my card for this week's color challenge on Splitcoast.   We were asked to use Pool Party, Wild Wasabi, and Chocolate Chip.   At first I didn't like those together, but once I toned down the WW it went together much, much better.    This card was totally inspired by a beautiful work of art by Teneale Williams.   Her cards are some of the most amazing I've ever laid eyes on, so be sure you swing by her blog and check them out.  If you notice, I used Raining Flowers again; maybe we'll be friends after all.  :)

Stamps:  Raining Flowers, French Foliage, Teeny Tiny Wishes
Ink:   Wild Wasabi, Chocolate Chip, Pool Party
Paper: Wild Wasabi, Chocolate Chip, Pool Party, Very Vanilla, First Edition designer paper
Accessories:   Vintage Brads, Very Vanilla 3/8 taffeta ribbon
Tools:  Big Shot, Framed Tulips embossing folder

Tuesday, July 19, 2011

MOJO 200: Raining Possibilities


What do you think about my take on this week's Mojo Monday sketch?   I have to say, I love it.   However, I have to share something...   When I saw that we were getting Raining Flowers as one of our Convention sets, I was very sad.   I HATED it.  Fitting with my card, I had to imagine the possibilities!  :o)  I was pleasantly surprised at how beautiful this came together at the end and maybe I don't hate that set as much as I though.  :)    

Stamps:  Raining Flowers, Word Play
Ink:  Rich Razzleberry, Baja Breeze, Island Indigo
Paper:  Whisper White, Rich Razzleberry, Baja Breeze, Island Indigo, Brights Designer Series Paper Stack
Accessories:  Brights buttons, Baja Breeze seam binding, White Baker's Twine, Basic Pearls
Tools:  Big Shot, Framed Tulips embossing folder, Vintage Wallpaper embossing folder, Elegant Lines embossing folder, cutter kit, sponges, Itty Bitty Punch Pack

Sunday, July 17, 2011

Convention 2011

 The cards above and below were my swaps for Convention.  They were simple, but I think they were still pretty.   I will definitely step up my game if I decide to go again.   :)

 This was my gift for my sweet roommate.   I hope she liked them.   I wrapped up the bracelet in some pretty paper and ribbon, which you'll see below.

I had so many bags and I made a tag for each and every one of them.  My shoulders hurt and I am happy to be home and not have to carry them around anymore.  

Here's me and my roommate, the amazing Jackie Topa.    It was so neat to get to spend time with her and bounce around some ideas.   She has challenged me to put together a tutorial for a stamp camp or class, so that's what I'll be working on for the rest of the month.   You can check out her blog here.

I have tons of pictures from Convention over on my Facebook page, so be sure to go check it out if you want to see tons and tons more.    While browsing the display boards, I found my swap from the regional in Ft. Worth last year!   I was so excited!    

Finally, Jason surprised me and painted our kitchen Not Quite Navy and Baja Breeze while I was away.   Isn't it gorgeous?!    Now I need some Cherry Cobbler curtains, so let me know if you happen to see any!  

Saturday, July 9, 2011

Button Buddies take 2!

Be warned!  You will be seeing a lot of this set.  I haven't placed my order from the new catalog yet, so this is my only new set.   I got it for free, so I love it for many reasons.  :)   I can already tell that it will be one of my favorite sets; I'm adding more buttons to my order-in-progress.    I saw Jaydee's lovely combination of Marina Mist and Real Red and had to use them myself.   What a perfect pair!  


Stamps: Button Buddies
Ink: Real Red
Paper: Marina Mist, Real Red, First Edition DSP, Very Vanilla
Accessories: Marina Mist ribbon (retired), Brights Buttons
Tools: Framed Tulips embossing folder, Big Shot

Friday, July 8, 2011

Techniques Class Cards

Embossing is fun, but double embossing is even more fun! Ink up your embossing folder with Versamark, emboss as normal in your Big Shot, and then add your embossing powder and heat. I want to redo this one and use plain card stock and a vintage brad for my flower as I think it would look better that way. 

Stamps: Teeny Tiny Wishes
Ink: Versamark, Basic Black 
Paper: First Edition DSP, Brights Designer Paper stack, Wild Wasabi, Very Vanilla, Rich Razzleberry
Accessories: black embossing powder, Rich Razzleberry ribbon, neutrals jumbo brads
Tools: scallop circle punches, 1/2 inch circle punch, Blossom Petals punch, Big Shot, heat tool, Vintage Wallpaper embossing folder


How about a different card fold? This is a pocket fold card and it is super easy to do. I decorated it with all the fun nautical items from the Summer Mini Catalog.

Stamps: The Open Sea, Teeny Tiny Wishes
Ink: Not Quite Navy
Paper: Riding Hood Red, Naturals White, Not Quite Navy, Nautical Expedition DSP
Tools: circle punches, Dotted Scallop Ribbon border punch, scallop edge border punch

Faux mother-of-pearl is one of my favorite new techniques. I love the aged look that it adds to a card.  Erica's lovely card was the inspiration for this card.   

Stamps: Nature Walk, Teeny Tiny Wishes
Ink: Soft Suede, Early Espresso, Staz on black
Paper: Soft Suede, Early Espresso, Cherry Cobbler, glossy white
Accessories: Frost White Shimmer Paint
Tools: Big Shot, Vintage Wallpaper embossing folder, sponges, plastic wrap


And just for fun:  

Here's a card using the fun new set, Button Buddies.   Pardon the crooked image; I was just too excited to get ink on my new toy!

Monday, July 4, 2011

Class Card & A Challenge

This is one of the cards for my next techniques class.   It uses one of SU's awesome clear blocks to make a background with ink.  I did that, stamped inside my square and voila!   How cool is that?   It is a perfect technique for French Foliage, which I am so, so happy to see return!

Don't adjust your television set!    Yes, it is a Christmas card!   Can you believe it?    This week the Paper Players challenged us to make a Christmas card and because I love those ladies, I did.    :)    Mojo Monday has a great sketch this week, so I combined the two challenges and came up with this card.   It has been ages since Season of Joy saw ink, so it was nice to get all nostalgic and use it.   It was one of my first stamp sets and I still love it.